How do I optimise images?
Preparing your images correctly before upload is essential to reduce page load and increase page speed results.
STEP 1 - Resize Images
The CMS requires a high resolution image - 2048 x 1280 pixels minimum and around 500kb.
Images must have a minimum quality.
Large images are used primarily for background gallery slides, but for other areas (banners and content blocks) and other devices the CMS will optimise and resize as required.
You can further optimise images by resizing images for mobile - 640 x 960 pixels.
Landscape images selected in the CMS will get cropped to the center in a portrait orientation.
Online image editor - https://pixlr.com/editor/
Use JPG format for all your gallery images. PNG format should not be used for photographs, only for logos and smaller graphics.
STEP 2 - Compress Images
See the link below were you can drag and drop PNG's and JPEG's images so they can be compressed and reduce the file size. It will use less bandwidth and load faster.
Image compression - https://tinypng.com/
STEP 3 - Filenames
Filename can give Google clues about the subject matter of the image. For example, my-new-black-kitten.jpg is better than IMG00023.JPG.
Adopt the following naming convention as best practice:
hotelname-location-keyword.(png/jpg/pdf).
STEP 4 - Upload to the CMS
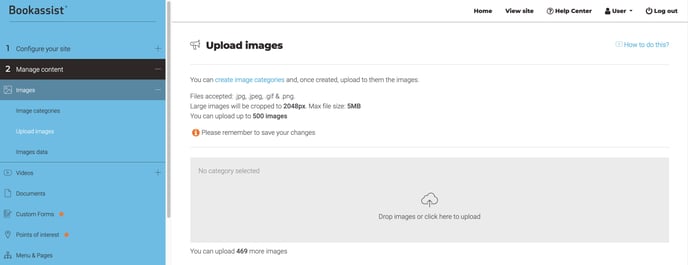
Go to : 2 Mange content > upload images
To better manage your images in the CMS, create a category or group so they can be easily found in the using filters. See Image Categories

Drag and drop images from your desktop or select grey area to browse and select from your computer. Make sure that the previous steps have been completed to optimise the image before upload.
View video on how to upload images to the media library in the SMART CMS
Images - https://youtu.be/OPbK8heJLfg